Hi everyone, this story might reflect you too. Lots of people who are new at WordPress and wanted to make their website live and they got lots of issues. So to burn out those issues, this blog will solve it in various hosting providers. This blog will be updating as there are many hosting providers. Let’s talk about Cloud. Cloud services are quickly becoming standard for a lot of businesses. This means knowing how to navigate multi-cloud platforms can benefit your business, you, and your product.
# AWS
Amazon Web Services (AWS) is one of them which is the biggest provider for cloud services, so it makes sense to consider trying it out. WordPress is an open-source blogging tool and content management system (CMS) based on PHP and MySQL that is used to power anything from personal blogs to high-traffic websites. It’s possible to build a WordPress architecture that takes advantage of many of the benefits of the AWS Cloud.
Before you get started, you’ll need to sign up for AWS.
By the end of series you will be able to deploy your WordPress site on AWS using different Services.
- You can sign up here.
- You’ll have to provide a credit card and a phone number where you will be called as part of the online registration process for verification purposes onto which they’ll charge $1 and receive a verification code via SMS.
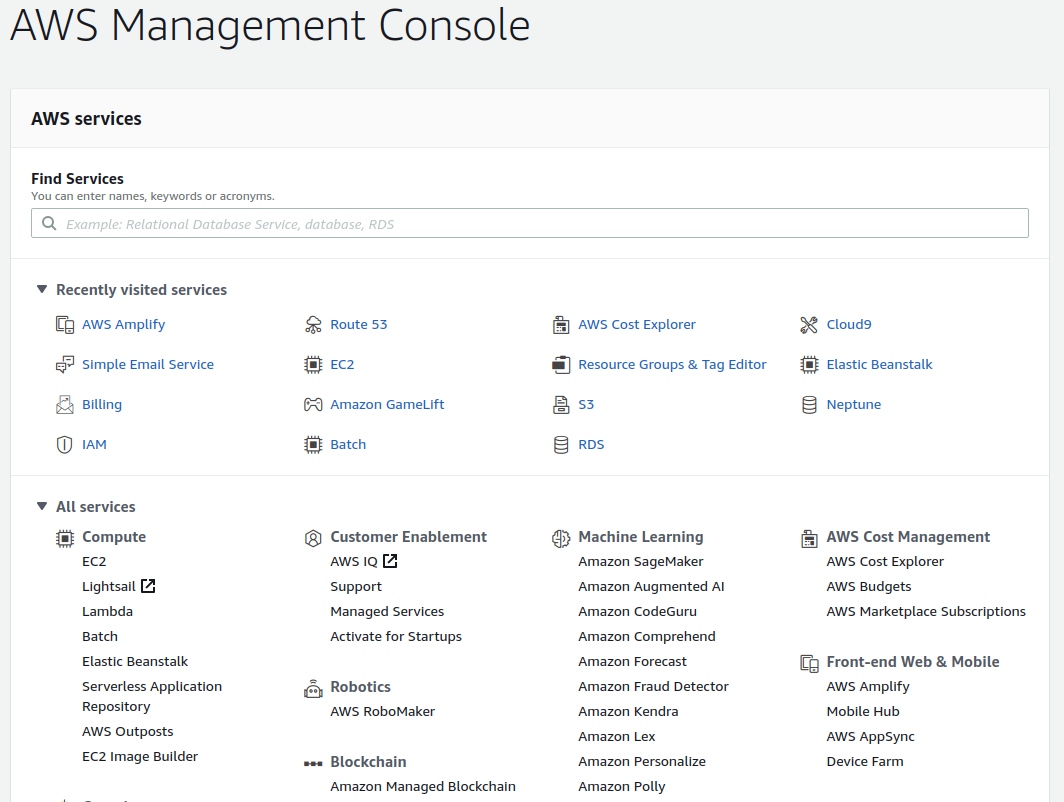
When you’re ready, select the Free support plan and you’ll get access to your console, which is where the magic happens.
It’s great to explore the services and even host real apps without being charged. I have split topics into three methods.
- Lightsail (Easy process)
- EC2 & Marketplace (Manual process more technical )
- EBS
I will about EC2 and EBS later on. Stay tune.
# Amazon Lightsail

When I heard about the first time about Lightsail, my mind realizes it was a topic related to Lightsail as types of Snail. Forget about these silly jokes. Let’s know about Lightsail and what it is about. It’s a service that allows you to quickly launch a virtual private server (a Lightsail instance) to host any production code.
Amazon’s idea is to provide virtual private server (VPS) installations for small and medium businesses, so they don’t have to worry about anything other than building their applications.
Lightsail is the easiest way to get started on AWS for developers, small businesses, students, and other users who need a simple virtual private server (VPS) solution. As far as I know Lightsail is the easiest way to get started for deploying your web apps if you don’t need highly configurable instance types or access to advanced networking features.
The small bloggers look for flexible cost pricing as the EC2 is based upon the usage. Henceforth, most of the small blog admins were not excited to pay such a huge kind of pricing and not many had the technical skills for managing the EC2 installation. That’s why lots of blogger prefer Lightsail over all services.
But you can still use EC2 for deploying your web app but it takes more time and effort to do it. So, I will highly recommend the Lightsail option as the implementation for a single server WordPress website or small business.
With Amazon Lightsail you can choose Windows or Linux/Unix operating systems and popular web applications, including WordPress, and deploy these with a single click from preconfigured templates. Customers running multiple WordPress instances find it challenging and time-consuming to update, maintain, and manage all of their sites. But with this integration, you can easily manage your multiple WordPress instances in minutes with only a few clicks.
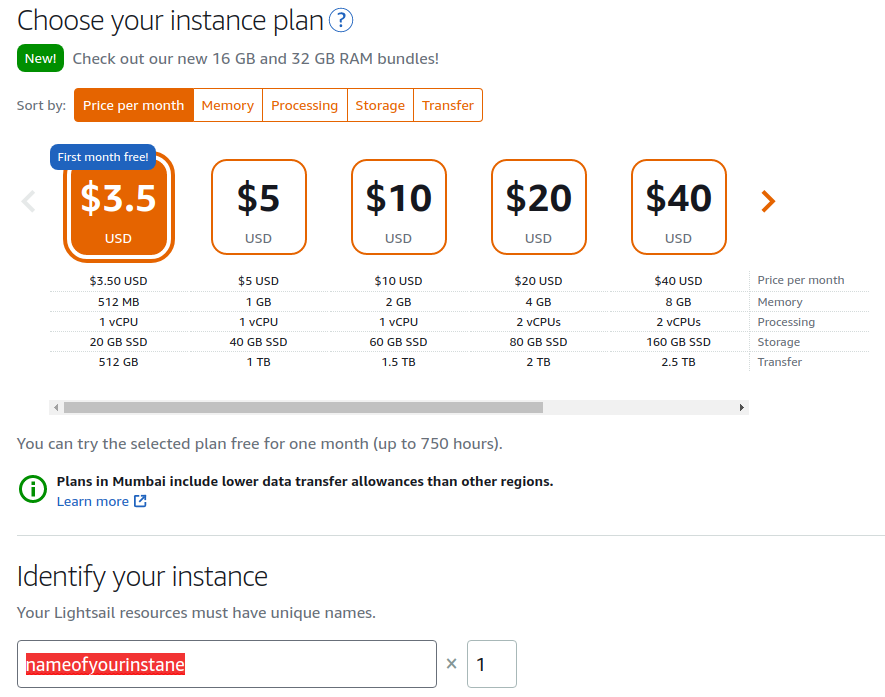
There are additional benefits on AWS LightSail that are not available on the Shared hosting like Static IP Address, DNS Management, and Backup stuff. With the Lightsail, you will get an AWS infrastructure that offers unparalleled performance. Here’s how you can create an instance and run up on AWS Lightsail.
But wait a second, there are few things which you need to understand before you start installing WordPress. AWS has a lot of regions and some regions have different data transfer limits. AWS Lightsail will give the closest region based on your location but you can change it according to the target audience for your site.
I would recommend you to choose based on the traffic you are expecting.
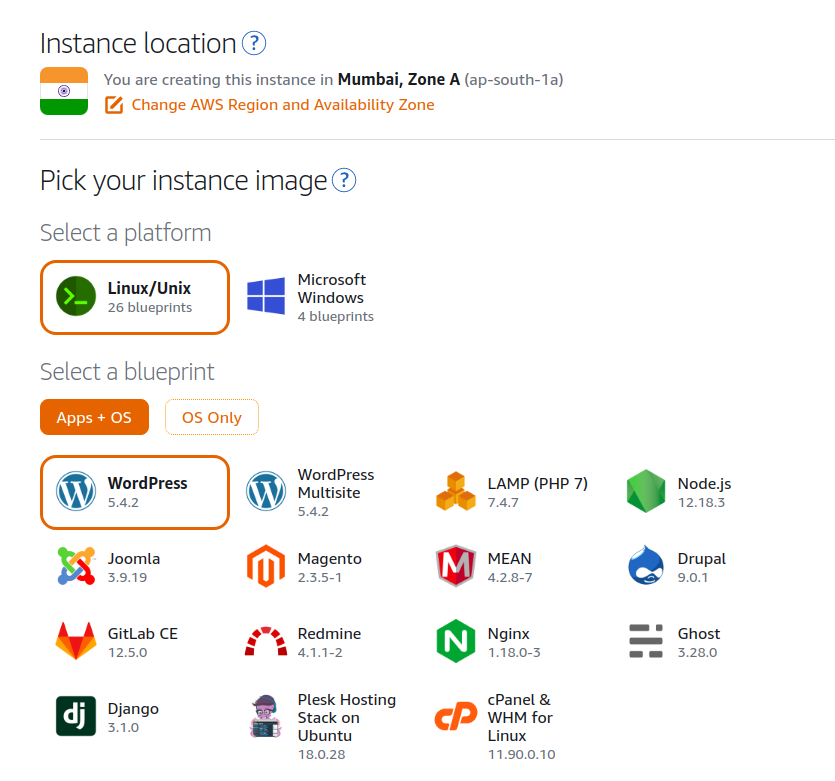
Login to your AWS account. Under Services, look for Lightsail. Click Create Instance. If you have already been using AWS for other services, it will automatically select your most used availability zone under the Instance location.
Once you are choosing any particular region, you need to pick an instance image. You can choose the image for OS only or Apps and OS both. This installs the software on your server where you can Select Apps + OS and then wish to select WordPress from the application list.
The free tier only offers one month free for the lowest instance plan. I found this sufficient for a basic site but you can change it in the future. Now name your instance, give it some meaningful name so that you can recognize that instance.
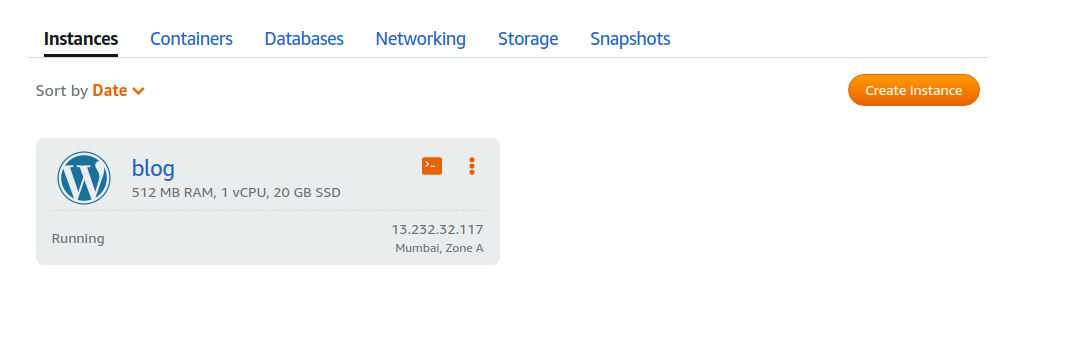
You will be taken to the Lightsail dashboard, on the Instances tab where you should see your newly created instance. It should say Pending while the instance is being created. Once it’s ready the status will say Running.
You can connect to the instance via SSH. When the instance is first launched, you will need to connect via SSH to your instance to get the WordPress admin login and password.
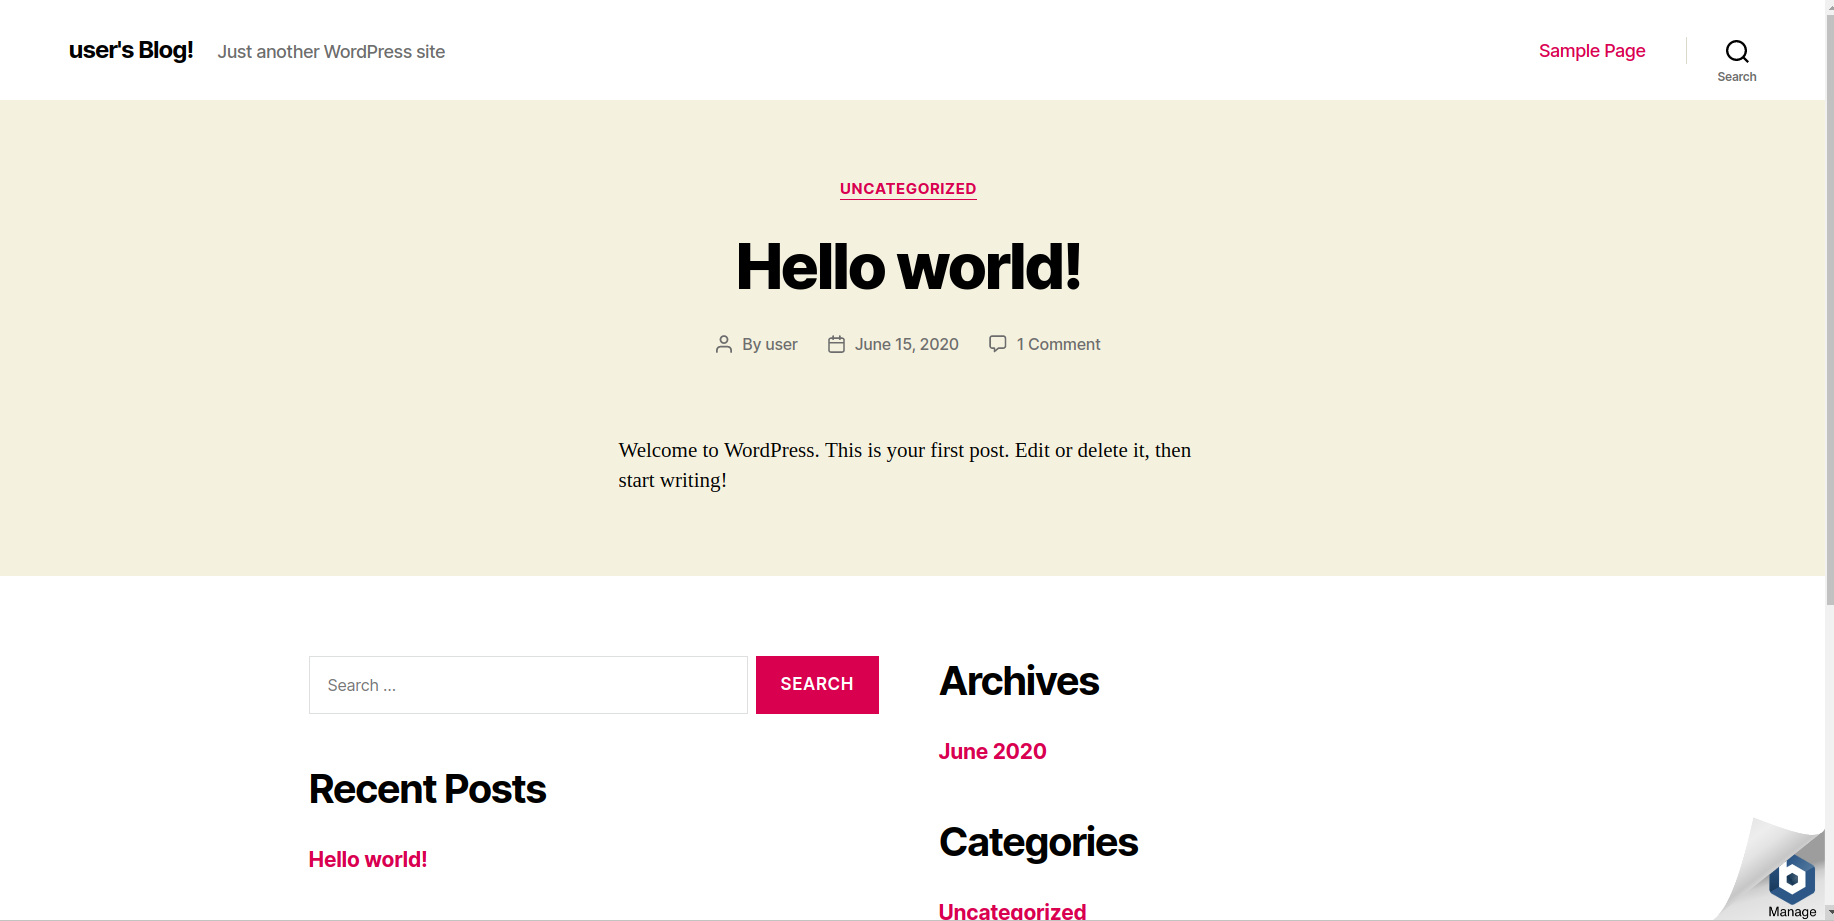
Go to your Lightsail dashboard. Click on your newly created instance. Test whether your WordPress site has been launched by entering your
There exists a Bitnami logo that will be displayed in the bottom-right corner and you can enter the below-given command for removing that logo from the website.
sudo /opt/bitnami/apps/wordpress/bnconfig -- disable_banner 1
Also, you can browse the website by checking the logo and if the need persists then you can restart the entire web server. For doing so, you can write the below-given command for restarting the webserver.
sudo /opt/bitnami/ctlscript.sh restart

Coming back to your Lightsail instance’s dashboard, click on Connect using SSH. This will open up a new window that looks like a terminal and log you into the instance automatically.
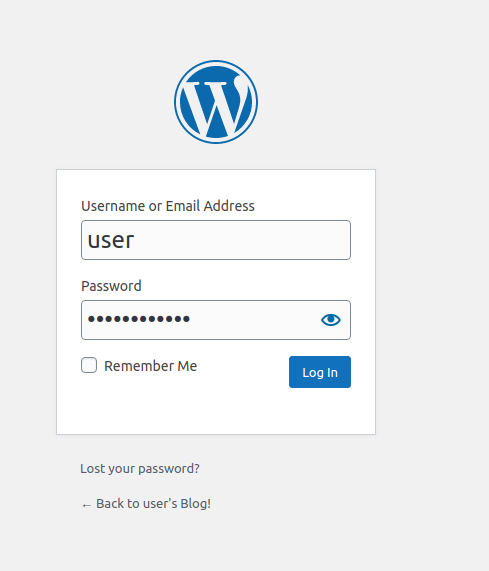
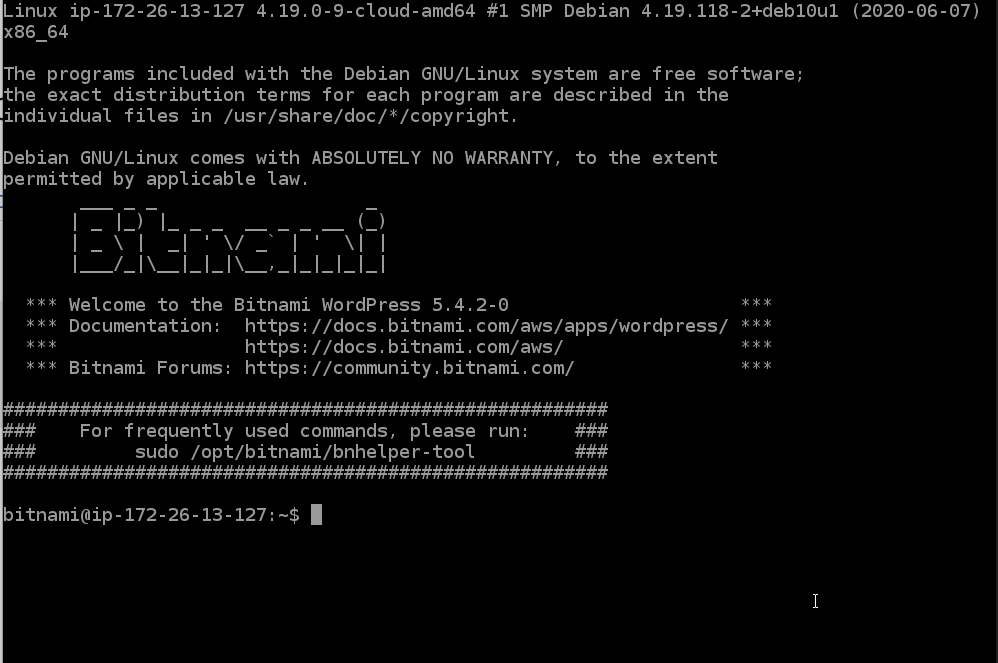 You will need a user-id and password for the WordPress admin login. The default user-id is “user”. Enter the following in the terminal:
cat bitnami_application_password
Your password will be displayed. Copy it. This will allow the password to be displayed on the copied code which is used to log in to the WordPress admin dashboard and close the SSH connection.

Go to the WordPress admin page public-IP-address/wp-login.php. The username is always user by default. And enter the password you just retrieved.
I would suggest creating another user with administrative privileges. Once you have created a new user, login with that user id and delete the default account.
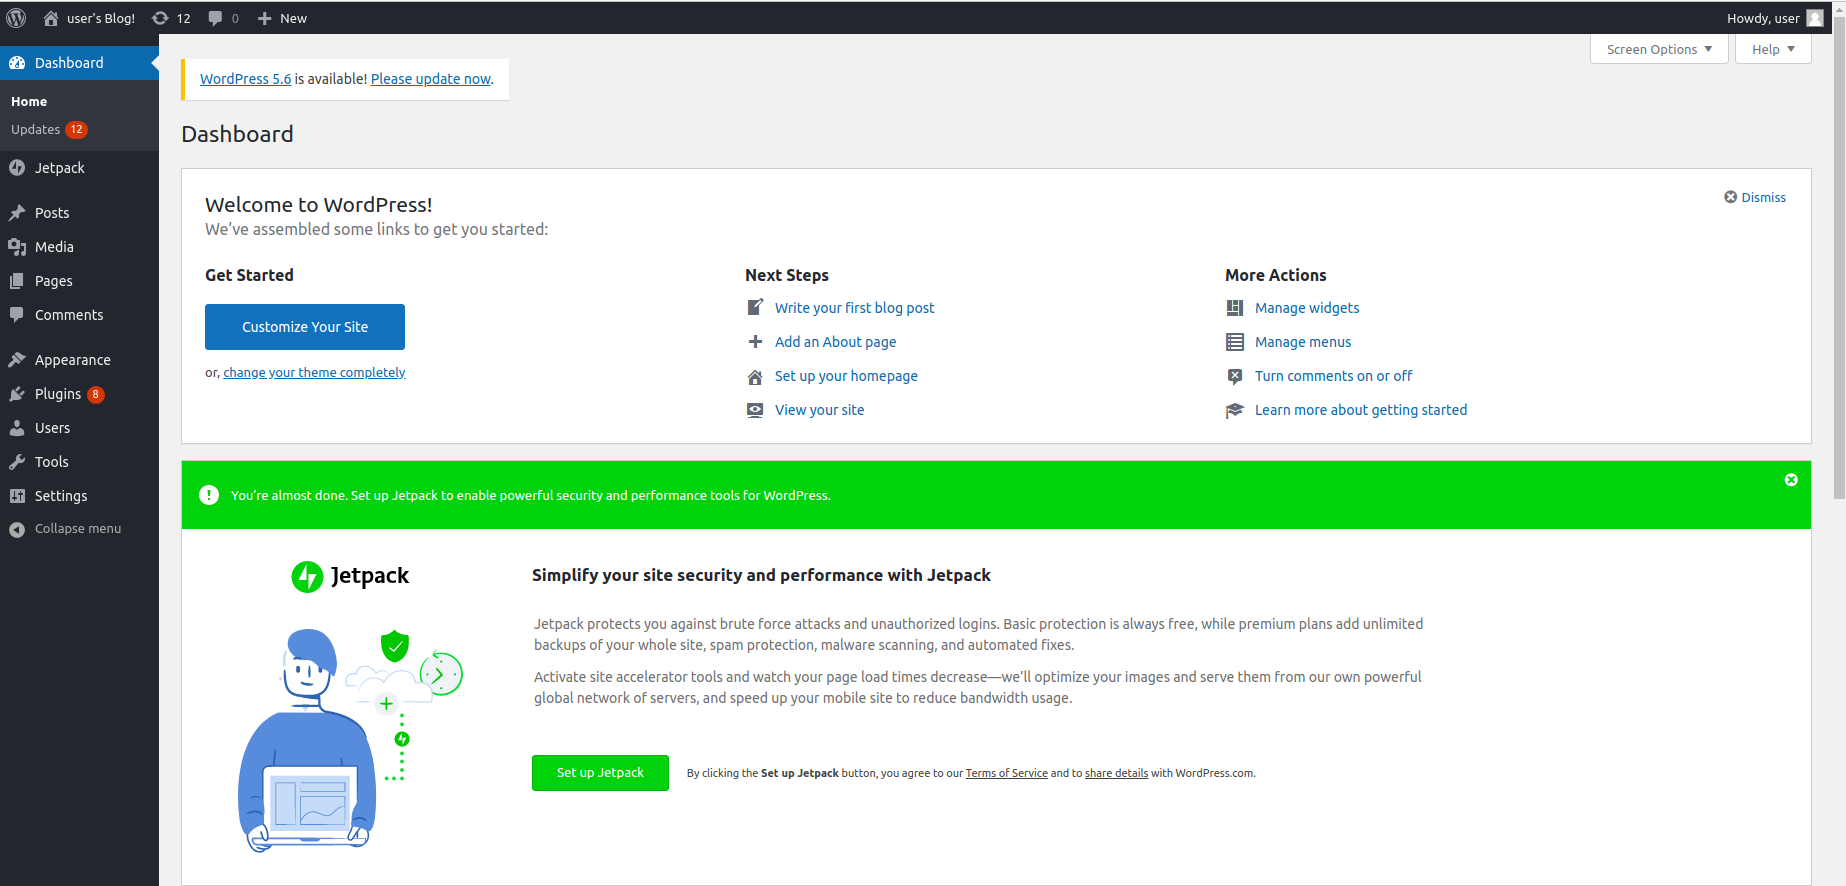
This is where you can edit the website. Before continuing with the next steps, check your Dashboard for any plugin updates. Make sure everything is up to date before you start editing.
You can install a theme. Finding an appropriate theme is half the work of building the website. Your WP installation comes pre-installed with some of their free and most popular themes like Twenty-Twenty. But you can browse for more as well.
Let’s point the site to the custom domain. Once you have the website ready or reason enough to make it public, we need to point a custom domain to it; you can’t share just Lightsail’s public IP address.
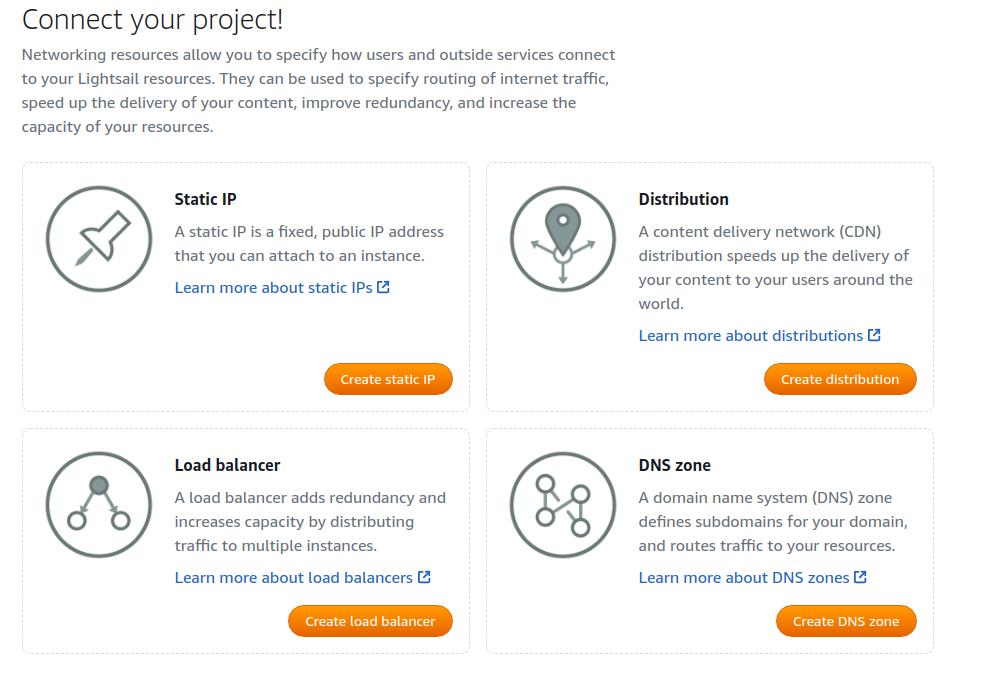
Go to your Lightsail dashboard. Click on your WordPress instance. Go to the Networking tab and create a static IP. It will ask you to attach it to an instance. Select your WordPress instance.
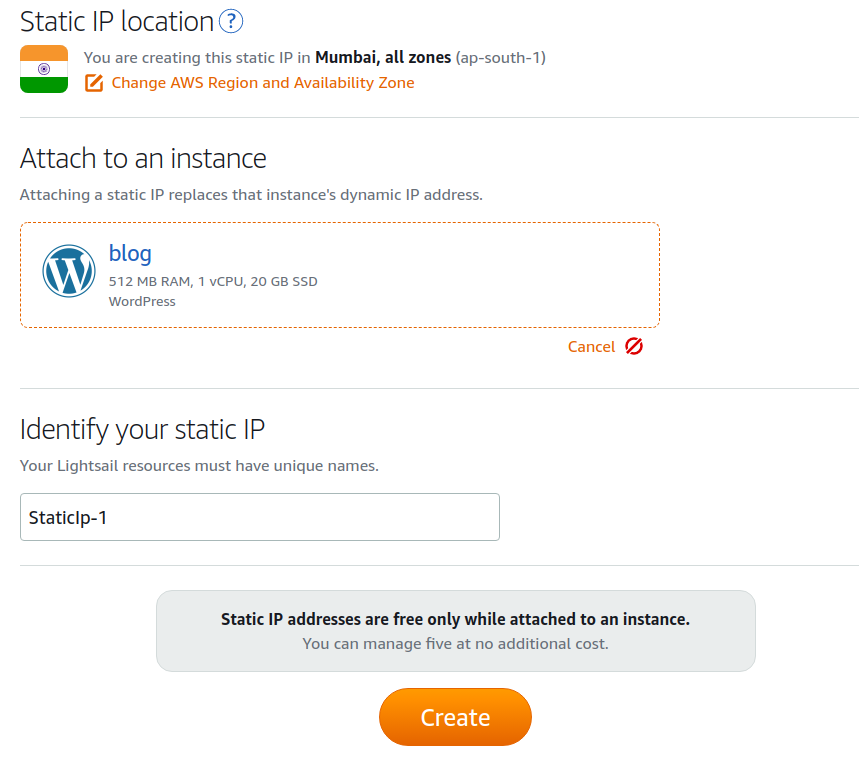
This is important. If you do not attach an instance to your static IP, you will be charged for it. Give it an appropriate name and create. Give it a few minutes for the site to get redirected to the new IP address.
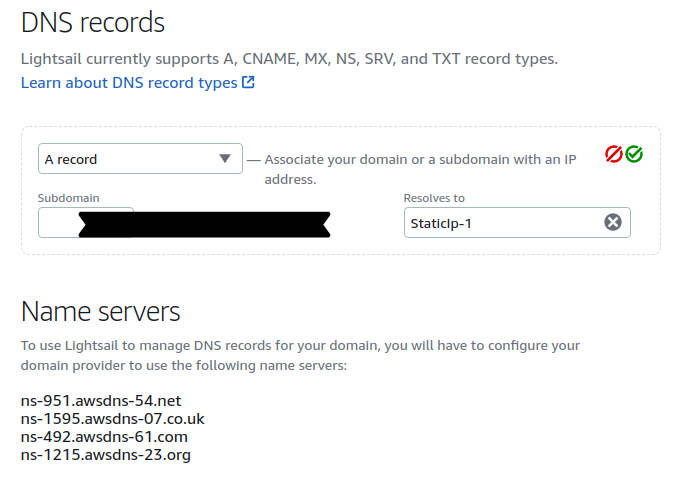
Let’s set up DNS. Now you have a WordPress installation running with a Static IP address. Now it’s time to tie that IP address to your website name. Head on over to your domain’s DNS settings. There are two ways you can do it and it depends on where you have purchased the domain name.
You also get DNS service from AWS free with your LightSail account. If you decide to use that, you need to set the nameservers with your domain provider. This way AWS will do the name resolution for your website and you will use the AWS infrastructure for that also.
If you want to use the LightSail DNS service, you need to create a DNS zone and add the DNS entries in that zone. You will get some nameservers for your DNS zone, which needs to be added to your domain provider as nameservers.

The other way is to keep using the services of your domain provider and update the A type record to point to a static public IP address. That way name resolution will happen with your domain provider and it will be transferred to your installation. If you don’t already have an A record for your domain, then add one:
- Record Type: A
- Record Name: [Leave blank if this is the root domain otherwise enter subdomain].
- IP: static-lightsail-IP
It’s all about the preference as you would not see much difference between both ways. The difference will be in some milli-seconds, so choose according to your choice.
DNS records can take time to update so do check after a few hours. A quick check on a terminal can be done as so host your-domain
Important: For the following steps, you must wait for the domain to fully propagate. So take a breather here before continuing.
Also, your WordPress dashboard will now be accessed via — your-domain/wp-login.
Let’s enable the HTTP2 Protocol. Bitnami WordPress image comes with HTTP1 protocol enabled by default but most of the browsers as of today support the new HTTP2 protocol. HTTP2 protocol can make your site loading faster because of parallel downloads on the single connection.
You should always enable the HTTP2 support while installing WordPress on the AWS LightSail. Apache server bundled with Bitnami image comes with HTTP2 support, it’s just not enabled.
To Enable the support you need to edit the file.
vim /opt/bitnami/apache2/conf/httpd.conf
Note: You can use any editor for it, I choose Vim for it.
Just open the file and search for http2 in the file. You should get the below line which needs to be updated.
#LoadModule http2_module modules/mod_http2.so
Just remove the ‘#’ from the start of the line to enable the http2 module for apache. After the edit, it should look like the below line.
LoadModule http2_module modules/mod_http2.so
Once done, update the file on the server to enable the http2 support enabled. Let’s enable Support For WordPress. Now the module is active and we just need to tell our server to use it while serving our WordPress site. That can be done by editing
/opt/bitnami/apache2/conf/bitnami/bitnami.conf
By default, the file comes with owner permission of root and you won’t be able to edit it with the SFTP access of Bitnami. Please use the below command to change the ownership of the file before editing it.
sudo chown bitnami:root /opt/bitnami/apache2/conf/bitnami/bitnami.conf
Now go ahead and edit the file to include the below line for every VirtualHost in the file. You can search for VirtualHost tag in the file and enter the below line above that tag.
Protocols h2 h2c http/1.1
For a single domain, you need to update it in two places. Once for the HTTP port and the other is for the HTTPS port. Once done, update the file in the server and restart the apache server with the below command.
sudo /opt/bitnami/ctlscript.sh restart apache
Now you have HTTP2 support enabled for WordPress installed and it will load faster on the modern browsers.
Let’s add an SSL Certificate as your domain points to your new WP site, let’s continue. Since this WordPress site is built using Bitnami on AWS Lightsail, Bitnami provides a nifty tool to set up free SSL certificates using
Let’s Encrypt. Go to your AWS Lightsail dashboard. Click on the terminal icon on your WP instance to login into it via SSH.
Once you’re logged in, run the certificate tool
sudo /opt/bitnami/bncert-tool
It might ask you to update it before running it; just follow the onscreen instructions. Once the tool is updated, run it again. First, it will ask you to enter the domain you wish to certify:
- example.com
- www.example.com
Then you will go through a series of questions on redirections. Typically, you redirect a www.example.com site to example.com.
Next, it will tell you the series of steps it’s going to perform. One brilliant feature of this tool is that it sets up auto-renew for your SSL certificates since Let’s encrypt only allows for 3 months at a time. After this, you will be asked to enter your contact details and agree to the agreement. And that’s all! Check your website; it should have a valid certificate.
# What about performance ???
You may eventually scale your web app or extend its server. What about accelerating Content Delivery? Any WordPress website needs to deliver a mix of static and dynamic content. Static include images, Js, CSS where dynamic content includes anything which is generated on the server-side. You might be suffering from network latency while delivering your content(static, dynamic) to clients all around the world. Accelerating it will improve the end-user experience and you can achieve using Amazon Cloudfront CDN.
# What about backup ???
AWS Lightsail comes preconfigured with the backup and restores services and it’s as easy as clicking a button. Once you are on the instance management panel, you can see a snapshot tab, which is for backup and restores. You can click on the snapshot, select the instance, and create a snapshot. This will create the backup of your complete disk.
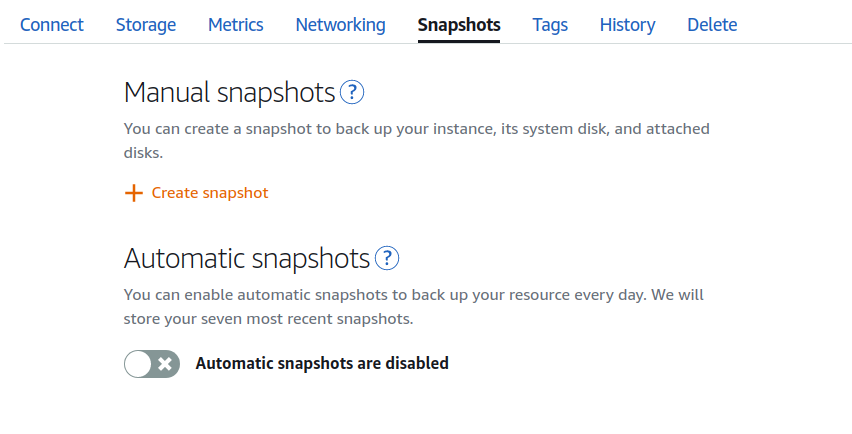
A snapshot is a way to create a backup image of your Lightsail instance. It is a copy of the system disk and also stores the original machine configuration (that is, memory, CPU, disk size, and data transfer rate). Snapshots can be used to revert to a known good configuration after a bad deployment or upgrade. To minimize the potential for data loss, ensure that snapshots are being taken on a regular basis.
If there is something wrong with your site and you want to restore, you can delete the instance and create a new instance with the snapshot backup. You can update the static IP to point to the new instance.
That’s how easy it is to take a backup and restore the WordPress site on LightSail.
# How about Setup WordPress Emails ?
The one drawback with the Lightsail account is that it doesn’t come ready with an email server. So your current WordPress installation cannot send an email out.
If you need to have email services you need to set it up. Lightsail WordPress installation comes with pre-installed plugins, one of them is WP Mail SMTP. WP Mail SMTP allows you to work with any SMTP service provider including Gmail accounts.
If you are planning to use a Gmail account then you can also use the Gmail SMTP plugin. Just install the plugin and follow the setup instruction to add a Gmail account. There are some other methods like installing the mail server on the instance.
You can use the Lightsail Metrics tab to monitor the CPU, data bandwidth, and memory usage. You can check and optimize your installation accordingly.
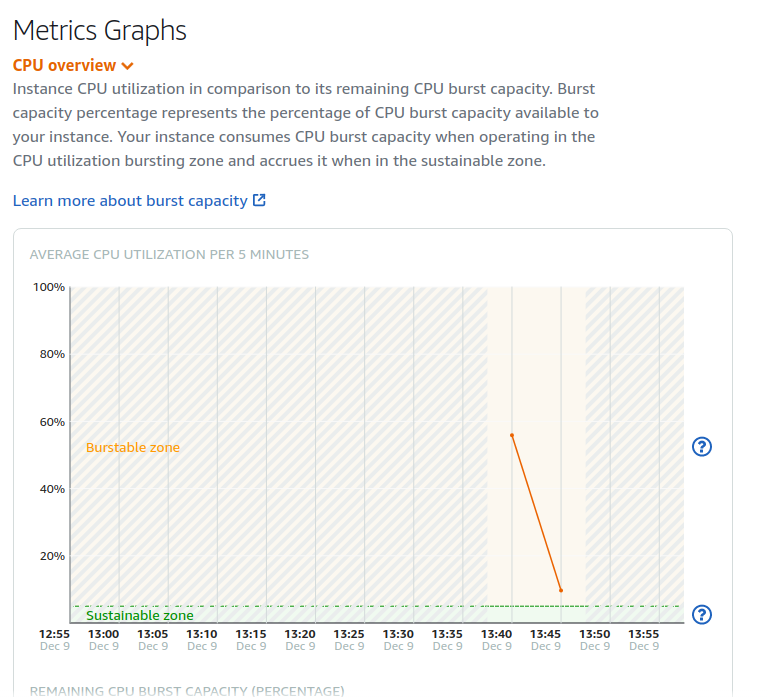
Lightsail also provides constant monitoring for your WordPress installation, you can check the status check messages on the metrics section also.
I hope with the help of this tutorial you should be able to install fully functional WordPress on the AWS LightSail.
# Shared hosting - Bluehost
Wondering how to install WordPress with shared hosting? You’re in the right place. In this guide, we’ll walk you through the process step by step. Learning how to install WordPress is very straightforward. It’s one of the easiest ways to get your WordPress site up and running. However, hosting companies understand the power of WordPress and many have begun to optimize their hosting services specifically for WordPress users. When it comes to the best WordPress hosting, Bluehost tops the game.
They have been around for a long and with their innovation, they make it easier for beginners like you to get started with a WordPress website really fast. If you’re worried WordPress is a little complicated to use, BlueHost is a great solution.
Fact: Bluehost is officially recommended by WordPress.org as an idle hosting for WordPress.
How Long Does It Take To Install WordPress On Bluehost? Installing WordPress on Bluehost takes 5 minutes after signing up with a Bluehost account. This guide is for newbies to learn how to install WordPress on Bluehost hosting. I have shared exact steps that would help you create your blog using WordPress. They’re simple, they’re innovating new stuff to make WordPress management easier, and they’re one of the best.
New accounts come with a free domain for 12 months, an enhanced control panel, and prices that start at $3.49 per month for the first year.
Does Bluehost Automatically Install WordPress? Yes, Bluehost does automatically install WordPress. In fact, once you sign up with a Bluehost account they will automatically walk you through the steps in choosing your WordPress login credentials along with picking out a Theme and then taking you right into the WordPress dashboard.

It will save you time, money and a whole lot of stress!. Let’s get going. Sign up to a Bluehost account and a free one-click WordPress installation is included. It’s all taken care of in your Bluehost registration. There’s also a handy money-back guarantee. If you’re not happy with Bluehost and cancel within 30 days, you’ll get your money back. There’s no financial risk learning how to install WordPress with Bluehost.
Next up you need to pick a Bluehost plan.
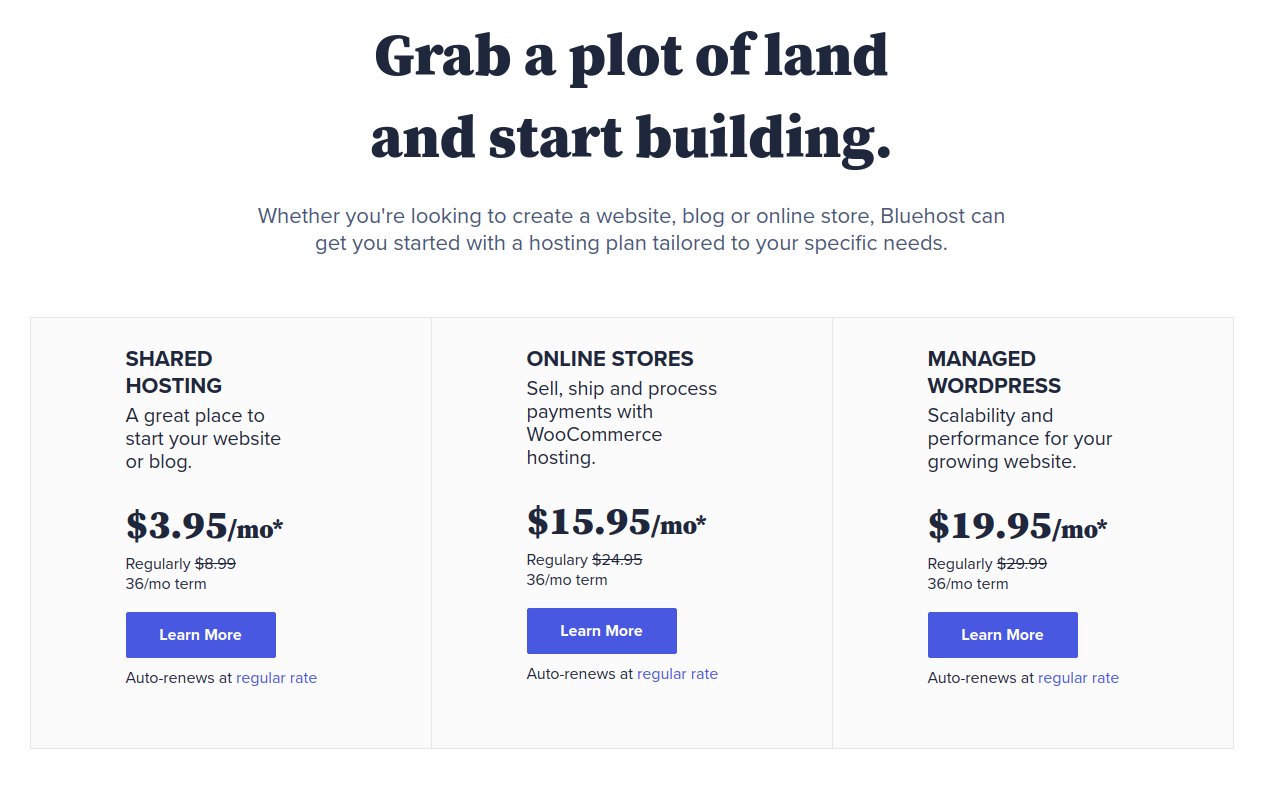
If you’re just starting out, the Basic plan is more than OK. The Choice Plus plan is more powerful. It comes with:
- Domain privacy : You can hide your domain name from public view. This can protect against domain hacking and minimize spam.
- SiteBackup Pro : Backs up your account’s files, emails and database, so that you can reuse them if something goes wrong. Think of it like a safety blanket.
There’s also a Pro plan that comes with security certificates. But if you just want to install WordPress with Bluehost, then the Basic plan is right for you. As your site grows, you can decide for yourself when to upgrade to a plan with more added-value features.
The last step in the Bluehost sign up process is to enter your payment details and confirm the order. Bluehost will now go ahead and set up your new hosting plan and domain name. You will then receive an email with payment confirmation as well as your new account information, including login and password details.
Once you’ve picked a plan, you need to enter your domain name. Here’s what the page will look like on Bluehost.

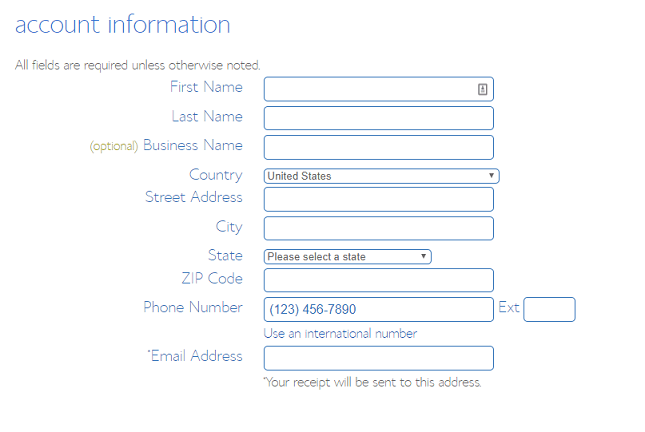
On the drop-down menu next to the name box you can choose your domain and whether it ends in .com, .net, .org or another variety. Think about which option is most relevant to your site and who you expect your visitors to be. Don’t worry if you’ve already got a domain name, you can enter it into the box on the right. Let’s connect Bluehost to WordPress is to create your Bluehost account. You have to fill out the details on Bluehost’s form.
The added Bluehost features are pretty solid. Having good search engine optimization (SEO for short) as you try to grow an audience can be a massive help. The higher your site appears in search engines like Google, the more visitors you will attract. Now you’ve signed up with Bluehost and have WordPress installed, it’s time to make use of that one-click set-up. This is what makes installing WordPress with Bluehost so seamless. At this stage, where you’ve just installed WP, your site isn’t live. It will just show a ‘Coming Soon’ page. You still need to set up and design your WordPress site, before launching it through Bluehost. In your control panel on the left hand side, select ‘My Sites’.
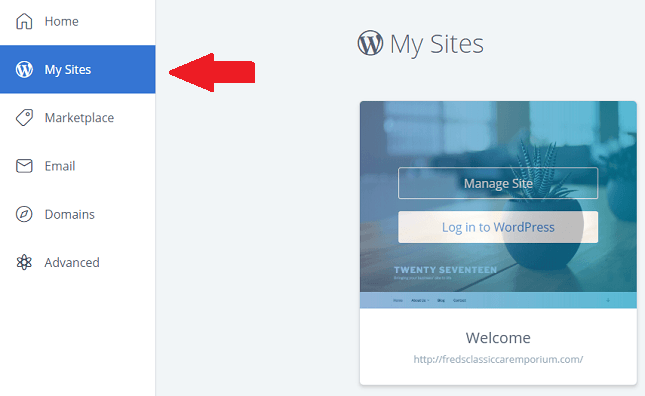
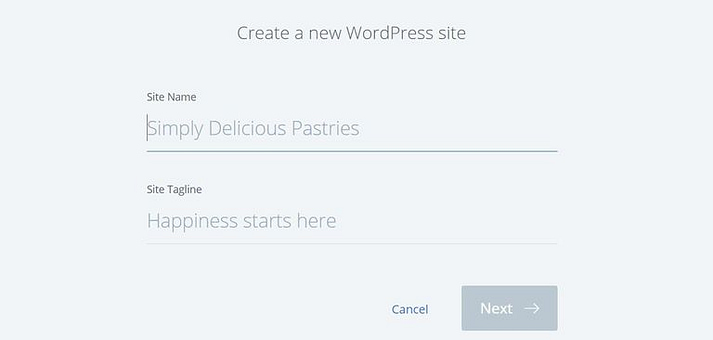
From here, you can log in to your existing WordPress site, which will be on the domain you gave Bluehost. Or you can select ‘Create Site’ and build a new site using WordPress.
If you didn’t select a theme during the Bluehost set up, one will have been chosen for you. Don’t worry you can change it at any point in the Themes section of your WordPress editor.
Signing up with WordPress plugin Jetpack is recommended. It improves security and, very importantly, cuts the time it takes to create your site by offering marketing and design help.
To launch your site into the world, go back to your WordPress control panel and click Bluehost in the top left corner. You can then hit ‘Launch’ to share it with the world. If you do get stuck, Bluehost’s customer service is top-quality. So if on any of our steps you hit a roadblock, contact Bluehost on LiveChat or over the phone.
Congrats, you have your website.
# Conclusion
Note: I will be updating this blog as possible as I can for deploying in multi cloud platforms as it will solve many newbies issues while deploying in Wordpress. Thank you